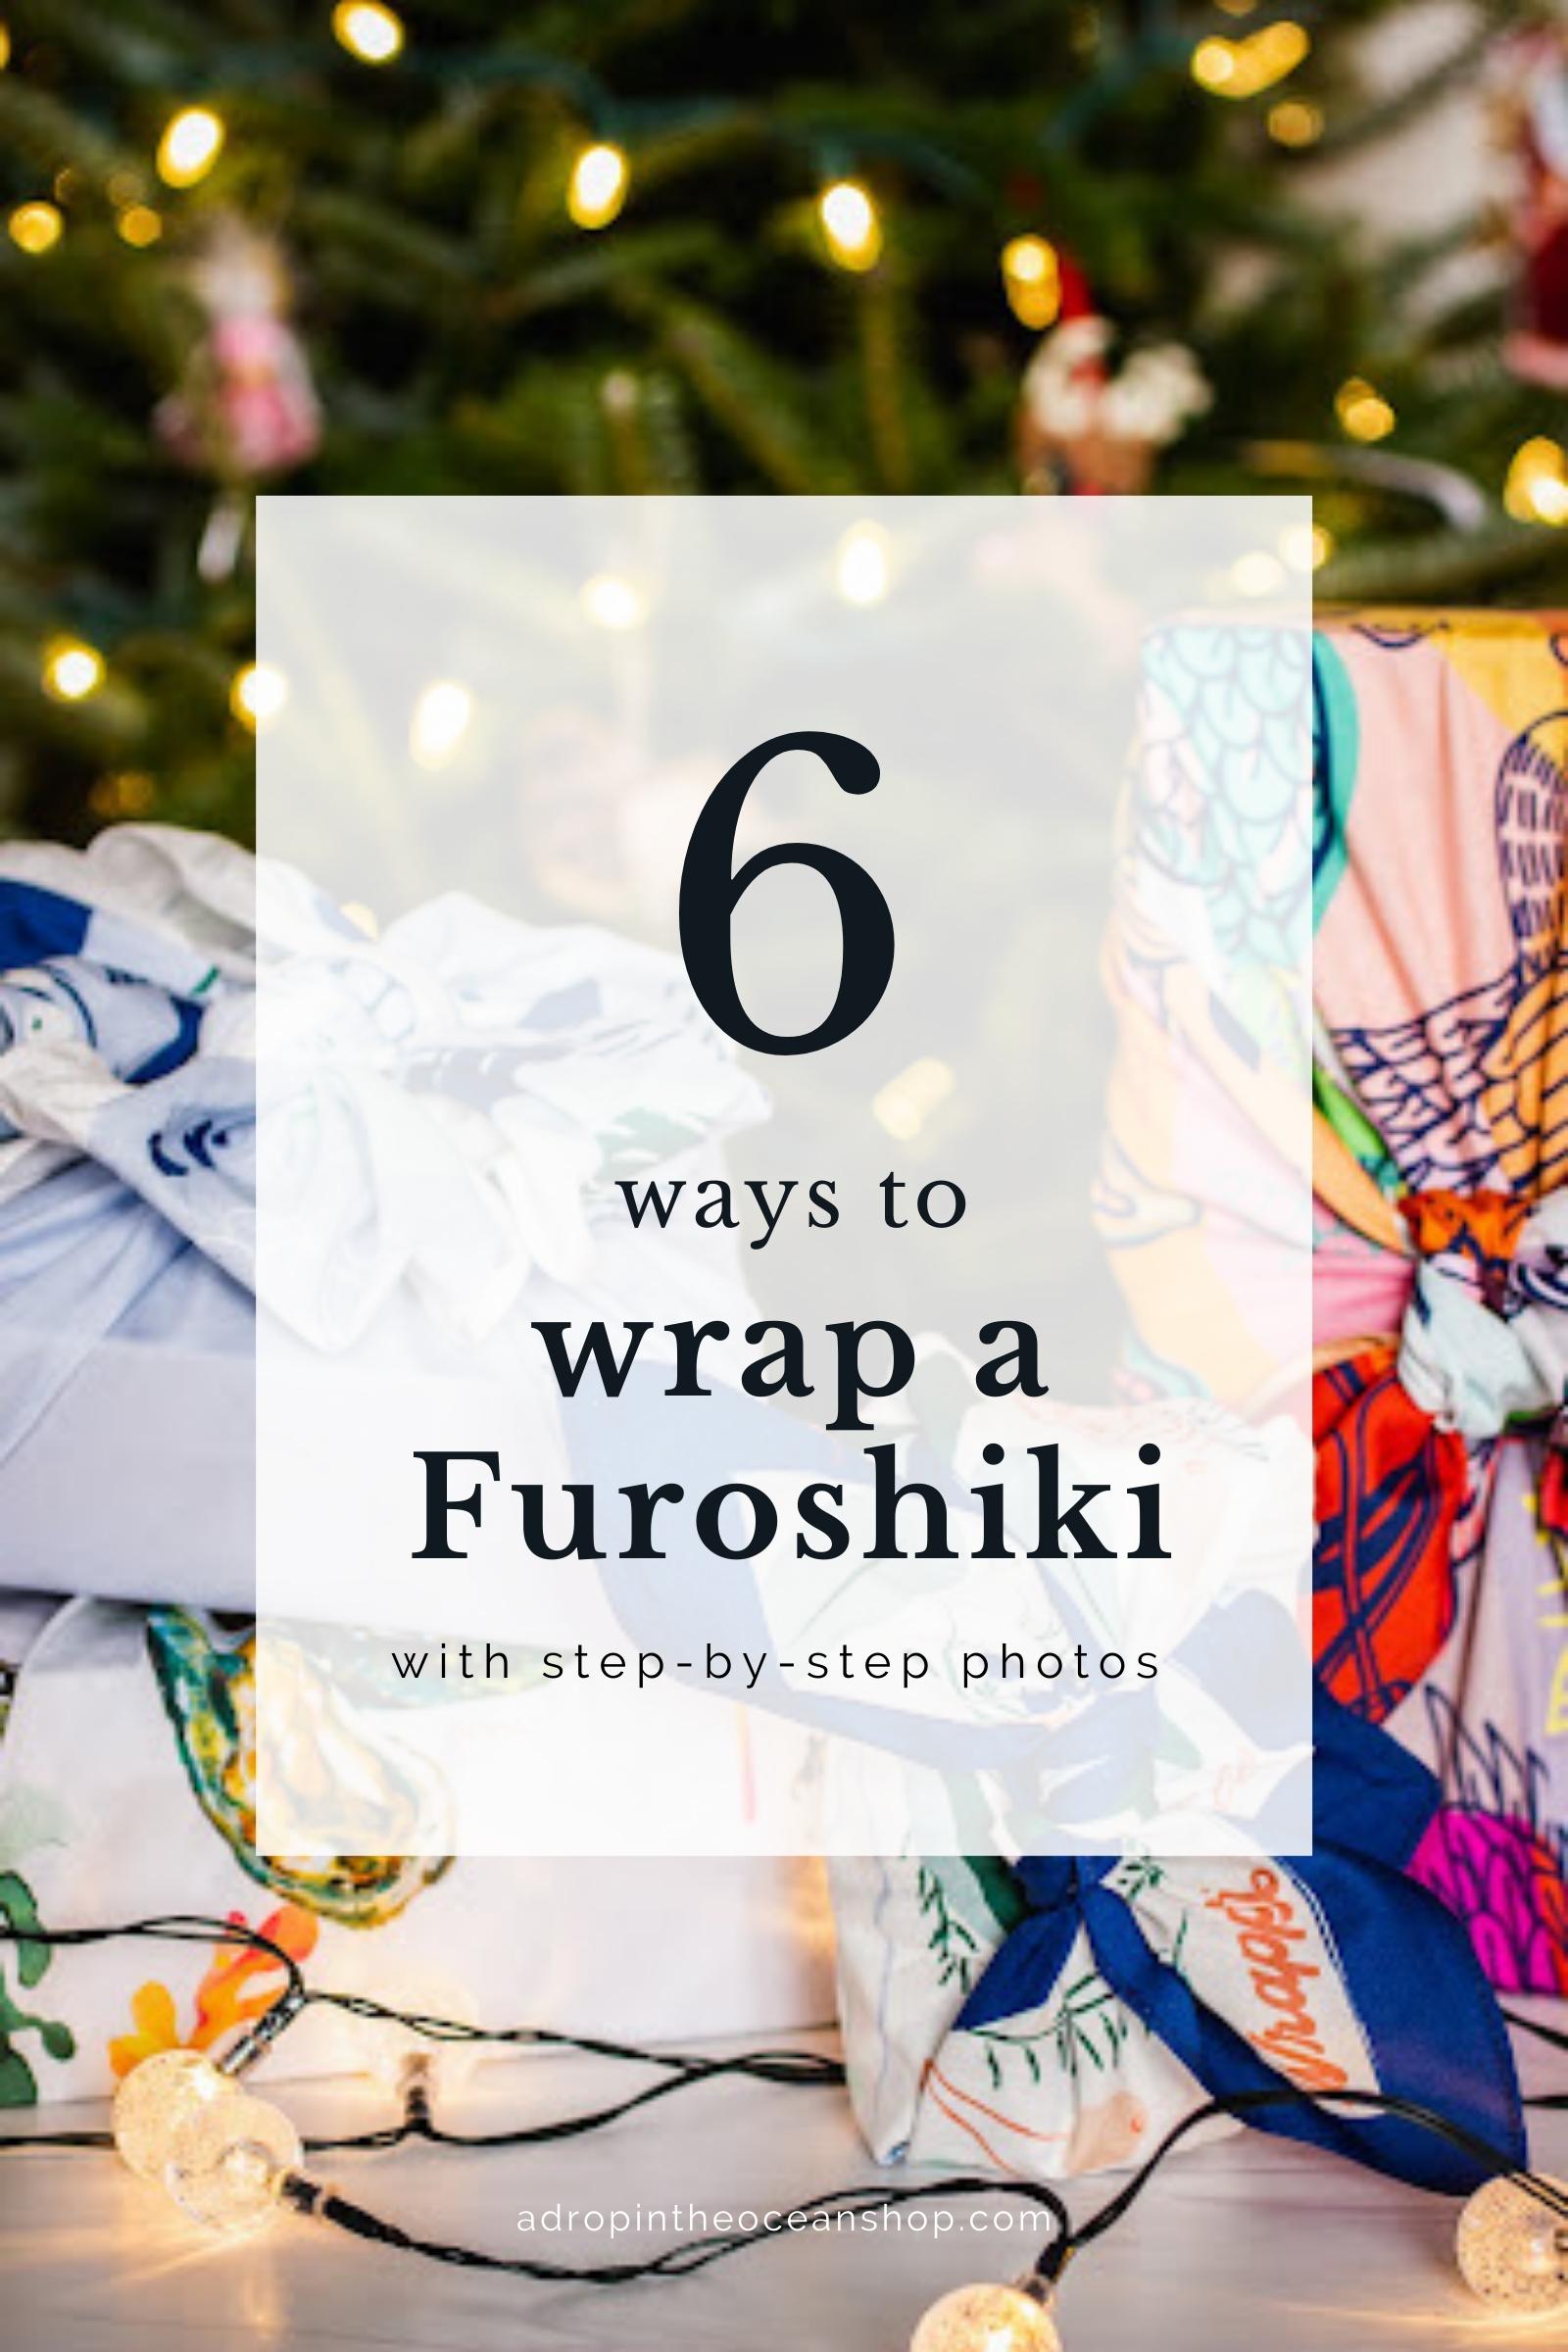
6 Ways to Wrap Furoshiki
This post first appeared in our weekly Make Waves Mondays email series on December 6, 2021.
Can you BELIEVE we’re already a week into December 2021, friend??
This year has absolutely flown by. ...Or is it just me? 🤔
With the holiday season upon us, that also means a lot more trash.
On average, we throw out about 25% more from Thanksgiving to New Years than we do the entire rest of the year - about one million additional tons of trash every single week.
And a lot of that trash is from wrapping gifts - think of all the unrecyclable wrapping paper, ribbons, boxes, and bags.

But the good news is...there’s a lot we can do to reduce our waste this holiday season. Last year, I shared some of my favorite zero waste and sustainable ways to wrap gifts, and this year I wanna show you some of the magic and beauty of Furoshiki wraps, and how to wrap six different types of gifts using just one wrap.
What is furoshiki?
Let’s start with the basics. Originating in Japan more than 1,200 years ago, furoshiki is a traditional wrapping cloth that was originally used to keep valuables safe for Emperors. Actually, during that time, furoshiki was called hirazutsumi, meaning flat folded bundle.
Then, beginning in the 1300s, bath houses were becoming common and furoshiki was used to carry clothes and then doubled as a mat while undressing. During this time was when furoshiki got its name, from a combination of the words furo (meaning “bath”) and shiki (meaning “to spread”).
Over time, furoshiki became common for carrying or wrapping nearly anything.
Tsutsumu is the Japanese tradition of wrapping. In Japanese culture, giving a gift without a wrapping is considered impolite. Wrapping gifts is a sign of respect. Furoshiki wraps are a simple, beautiful, artful, and sustainable way to wrap gifts of all shapes.
Fabric wrapping is not unique to Japan, however. For example, bojagi is a Korean wrapping cloth, although traditionally made of many small pieces of fabric, compared to a furoshiki of one whole piece of fabric.
Why is furoshiki popular now?
The world post-World War II saw a decline in reusable goods. While pre-war, disposability was absurd (who would pay money for something they’re just gonna throw away??), post-war, plastics manufacturers no longer had steady demand from the war, and shifted their attention to us as consumers, convincing us to buy plastics and buy disposable.
From the rise in popularity of plastic shopping bags and disposable, well, everything, furoshiki declined in popularity for several decades.
But now, as we are becoming more aware of the dangers of plastics and how much trash we’re throwing away, furoshiki has regained popularity as a sustainable, reusable, zero waste alternative to disposable gift wrapping. They’re also great for things like:
- Using as a shopping bag
- Carrying items for a picnic
- Using as a lunch bag
- Wearing as a scarf or bandana
- Wrapping and protecting items while traveling
What’s so great about our furoshiki wraps?
I may be a bit biased, but I adore the furoshiki wraps we have in the shop here at A Drop in the Ocean. Let me count the ways...
First, all of our reusable furoshiki wraps are designed by independent artists across the world, who receive a commission for every wrap sold in their designs. What I really love about this, though, is that supporting and promoting independent artists isn’t just an afterthought - it’s woven into the business model as part of the company mission, “to eliminate the waste created by gifting and support real artists.”
Second, our furoshiki wraps are printed on organic cotton fabric, meaning there’s about 71% less water used in the growing process, no chemicals entering the environment, and overall produces about 46% less carbon emissions than conventional cotton. Yes, please!
Third, and certainly not least, each of our furoshiki wraps include a reusable gift tag, inspired by those old school library cards. How cool would it be to each year see one more name and occasion listed on the tag, to watch how far one wrap has come?? And the little twine wrapping that holds the tag and the wrap together can be reused over and over, too, to attach the tag to the gift. Zero waste gift wrapping, through-and-through.
Furoshiki wraps are a seasonal item here at A Drop in the Ocean - typically from mid-November through the holiday season. Join our email list to be the first to know when they're available each year!
How do I wrap a furoshiki?
Well now that’s the main reason for today’s email, isn’t it? Let’s dive in and I’ll show you six of my favorite ways to wrap gifts of all sizes with furoshiki.
Quick note: I highly recommend ironing each wrap before using. There will be some slight creases in your wraps when you first receive them, and will have creases after use. Ironing before each wrapping will make your gifts look extra beautiful.
Basic Double Bow
Featuring our Birds & Berries large wrap and a 10.5” x 6” x 4.25” box.
This wrap is the simplest way to wrap furoshiki, but still looks beautiful. A great starting point for anyone!

- Lay your wrap flat and iron.
- Flip wrap over so it lays right-side down, and place your gift box diagonally in the center of the wrap.
- Grab two opposing corners, bring them to the center, and tie them tightly together with a square knot.
- Tuck the edges of one of the open sides in along the edge of the box to create tight edges, and bring the corner tightly across the gift box.
- Repeat step four with the remaining corner. Pull tightly and tie the corners tightly together with a square knot.
- Adjust and tuck as necessary.
Foldover with Single Bow
Featuring our By the Seashore small wrap and a 7.5” x 6.5” x 3.25” box.
This is my personal favorite way to wrap furoshiki. It’s super simple to wrap, and looks so stunning!

- Lay your wrap flat and iron.
- Flip wrap over so it lays right-side down, and place your gift box diagonally in the center of the wrap.
- Grab one corner and fold tightly across the box. Repeat with the opposing corner, so the corners lay one over the other.
- Tuck the edges of one of the open sides in along the edge of the box to create tight edges, and bring the corner tightly across the gift box. (In the image you can see what I mean by tucking the edges with my right hand.)
- Repeat step four with the final remaining corner. Pull tightly and tie the corners tightly together with a square knot.
- Adjust and tuck as necessary.
Mason Jar Foldover with Single Bow
Featuring our Evergreen small wrap and one 16oz wide-mouth mason jar.
Gifting something a little more round? Here’s a simple wrap for all things more mason-jar shaped.

- Lay your wrap flat and iron.
- Flip wrap over so it lays right-side down, and place your jar diagonally in the center of the wrap.
- Grab one corner and fold tightly across the side of the mason jar so there’s about one inch between the edge of the folded corner and the edge of the opposing corner.
- Tuck the furoshiki tightly against the mason jar and roll the jar in the wrap as tightly as possible.
- Make sure the jar is sitting evenly between the two open corners. Pinch the open edges closed, and bring across the jar to fold into a square knot (similar to steps four and five in the two above examples).
- Adjust and tuck as necessary.
Double Jar Basic Bow
Featuring our Rebirth small wrap and two 16oz regular-mouth mason jars.
This wrapping style is great if you’re gifting more than one bottle or jar. This example was done with a small wrap and two mason jars, but it would also work well with larger jars or bottles and a large wrap.

- Lay your wrap flat and iron.
- Flip wrap over so it lays right-side down, and place your jars diagonally at one corner of the wrap, leaving a couple inches of space between them.
- Grab the corner closest to the jars and fold tightly across the jars, tucking underneath them.
- Roll the jars in the wrap as tightly as possible.
- Make sure the jars are sitting evenly between the two open corners. Pinch the open edges closed, and fold the wrap into itself so the jars are now standing upright next to each other. Fold the corners into a square knot.
- Adjust and tuck as necessary.
Wine Bottle with Single Bow
Featuring our Celebration large wrap and one standard wine bottle.
Gifting a bottle of wine or spirit? I love how cute this wrapping looks - and how simple it is to do!

- Lay your wrap flat and iron.
- Flip wrap over so it lays right-side down, and place your bottle diagonally in the center of the wrap.
- Grab the corner at the bottom of the bottle and fold tightly upwards across the bottle.
- Repeat step three with the opposing corner at the top of the bottle, so the corners lay one over the other.
- Fold the edges on either side of the bottle in on themselves, so they create more pointed corners.
- Pull the corners tightly across the bottle.
- Wrap the corners around to the other side of the bottle and tie in a square knot.
- Adjust and tuck as necessary.
Double Bow with Flower Tuck
Featuring our Frost large wrap and a 6.5” x 6” x 2.25” box.
I’m a wee bit obsessed with this furoshiki wrapping style, building on the Basic Double Bow folding style. It does take a bit more patience and trial-and-error than the others, but if you ask me, it’s totally worth it with how stunning it looks! Note that this wrapping will require a larger wrap used with a smaller box.
Protip: The first time you give this wrapping style a shot, you might want to keep your iron on until you’re done and happy with the result. I had to restart several times and between each attempt I re-ironed the furoshiki wrap so the final flower remained wrinkle-less.

- Lay your wrap flat and iron.
- Flip wrap over so it lays right-side down, and place your gift box diagonally in the center of the wrap.
- Grab two opposing corners, bring them to the center, and tie them tightly together with a single knot (do not use a square knot this time!).
- Tuck the edges of the open sides in along the edge of the box to create tight edges, and bring the corners tightly across the gift box. Tie the corners together tightly with a single knot (do not use a square knot!).
- Grab the opposing corners from step three and tie them again in a single knot above the knot from step four.
- Grab one of the corners, and loosely fold in half widthwise to tuck the corner into and below the center knot.
- Repeat until all four corners have been tucked, creating a flower effect.
- Adjust and tuck as necessary.
If you give any of these or any other furoshiki wrapping a try, I’d love to see them! Share them in the EcoWarrior Pod or tag us (@adropintheoceanshop) on Instagram!


Leave a comment